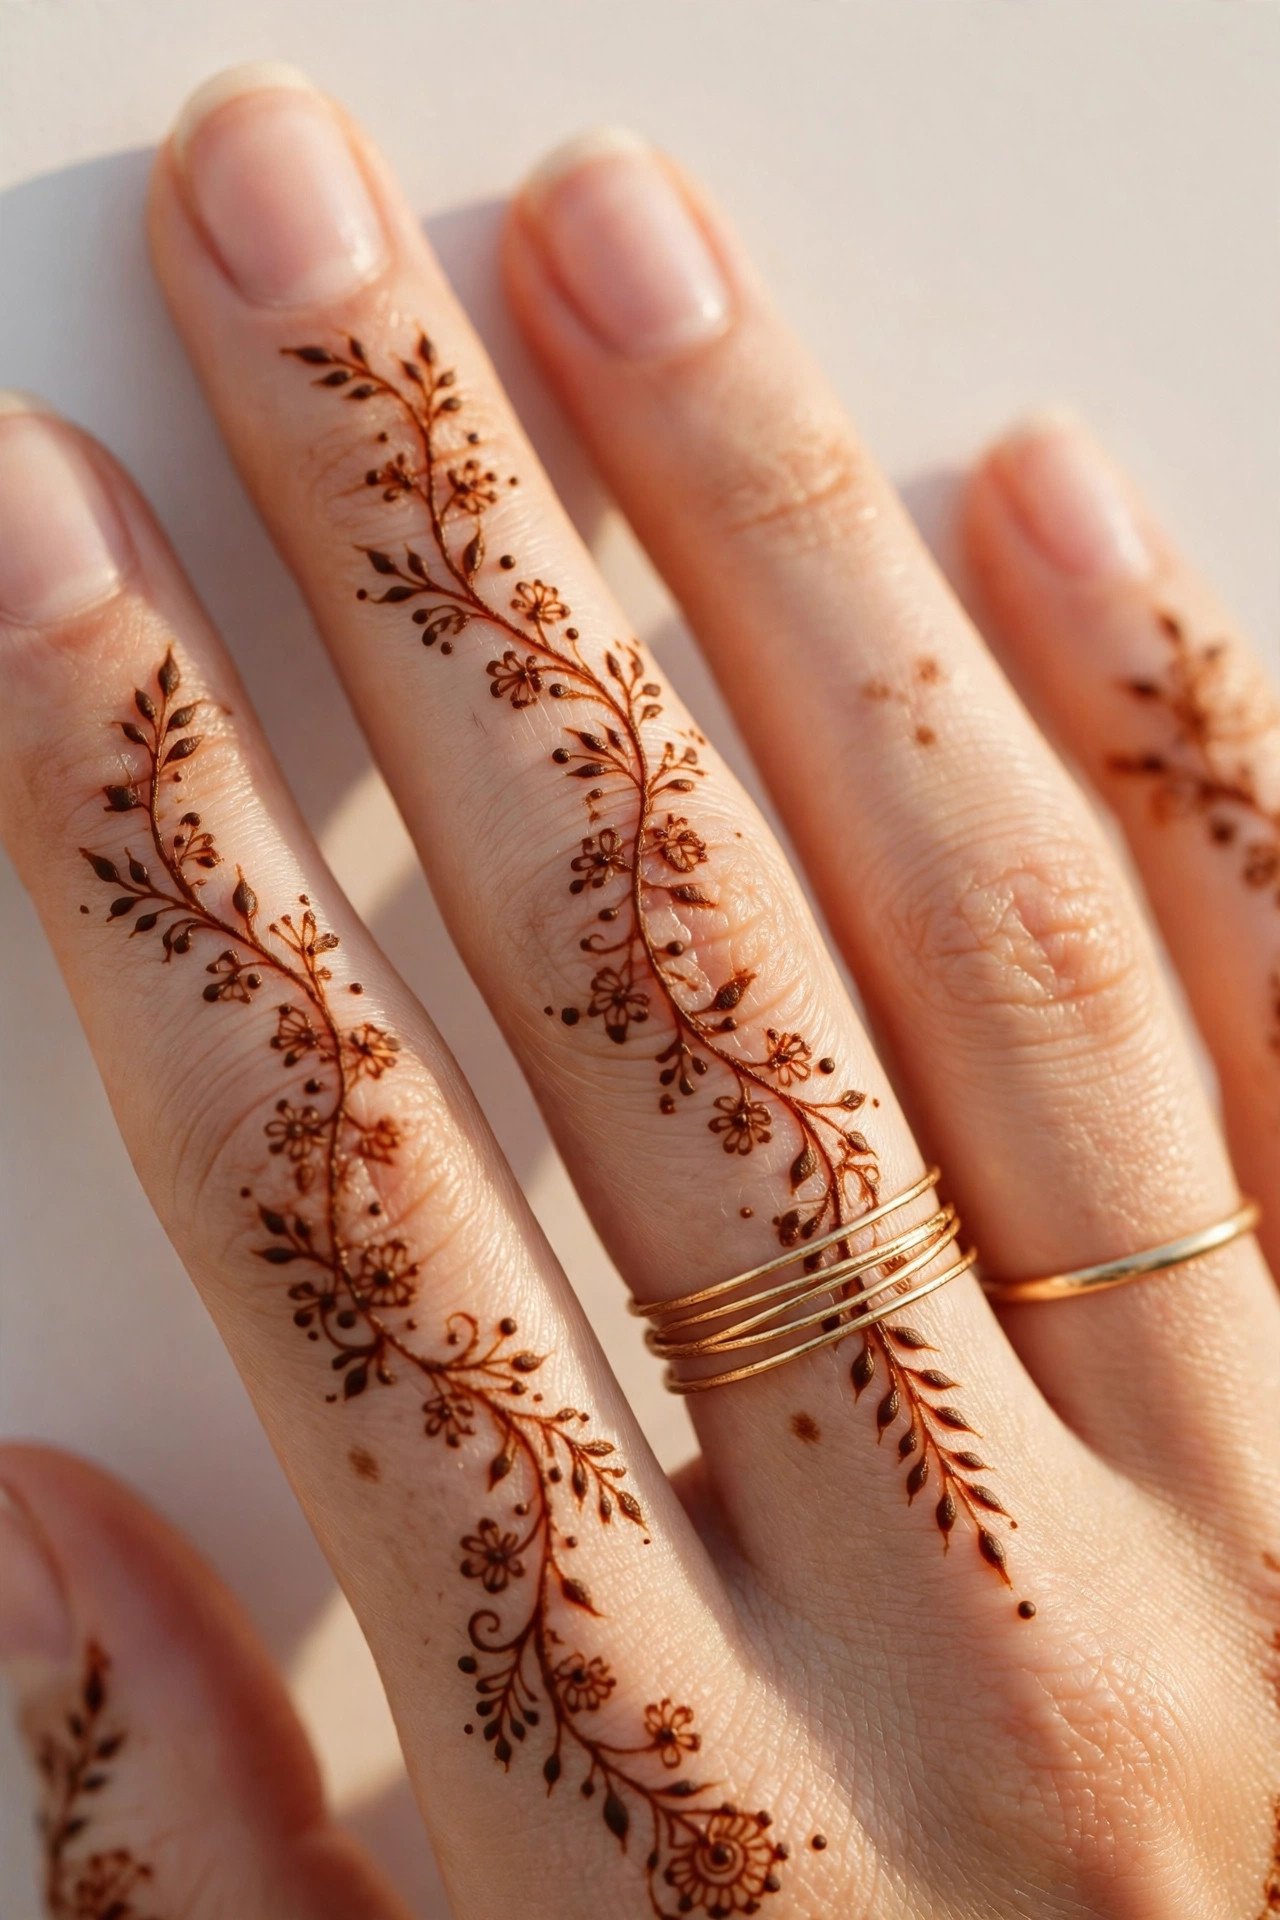
Finger mehndi is the jewellery of the henna world: small, precise, and made to be photographed up close. While a full-hand design can take hours, a finger design takes minutes, and it has a special advantage — it frames your rings, your manicure, and the natural shape of your hands. A thin band can look like a stacked ring, a winding vine can lengthen a finger, and a chain of tiny flowers can turn an everyday hand into something worth a second look.
The fourteen designs below stay entirely on the fingers, so they are quick to apply, easy to wear with any outfit, and simple to remove from your routine when you want a bare hand again. Mix a band on one finger with a vine on another, or keep every finger matching — both approaches work. Here are fourteen finger mehndi designs, from ring-style bands to vines and tiny florals.
1. Stacked Ring Bands

Thin henna bands stacked around each finger mimic a set of stacked rings, and they are the easiest finger design to draw well: straight lines around a finger need no artistic skill, just a steady hand. Vary the spacing — two bands close together, then a gap, then a dotted band — so the set looks styled rather than uniform. The look takes about ten minutes for all four fingers and pairs beautifully with one real ring worn on top of the bands. Keep your nails short and polished in a neutral shade so the bands stay the focus.
2. Vine Winding Up One Finger
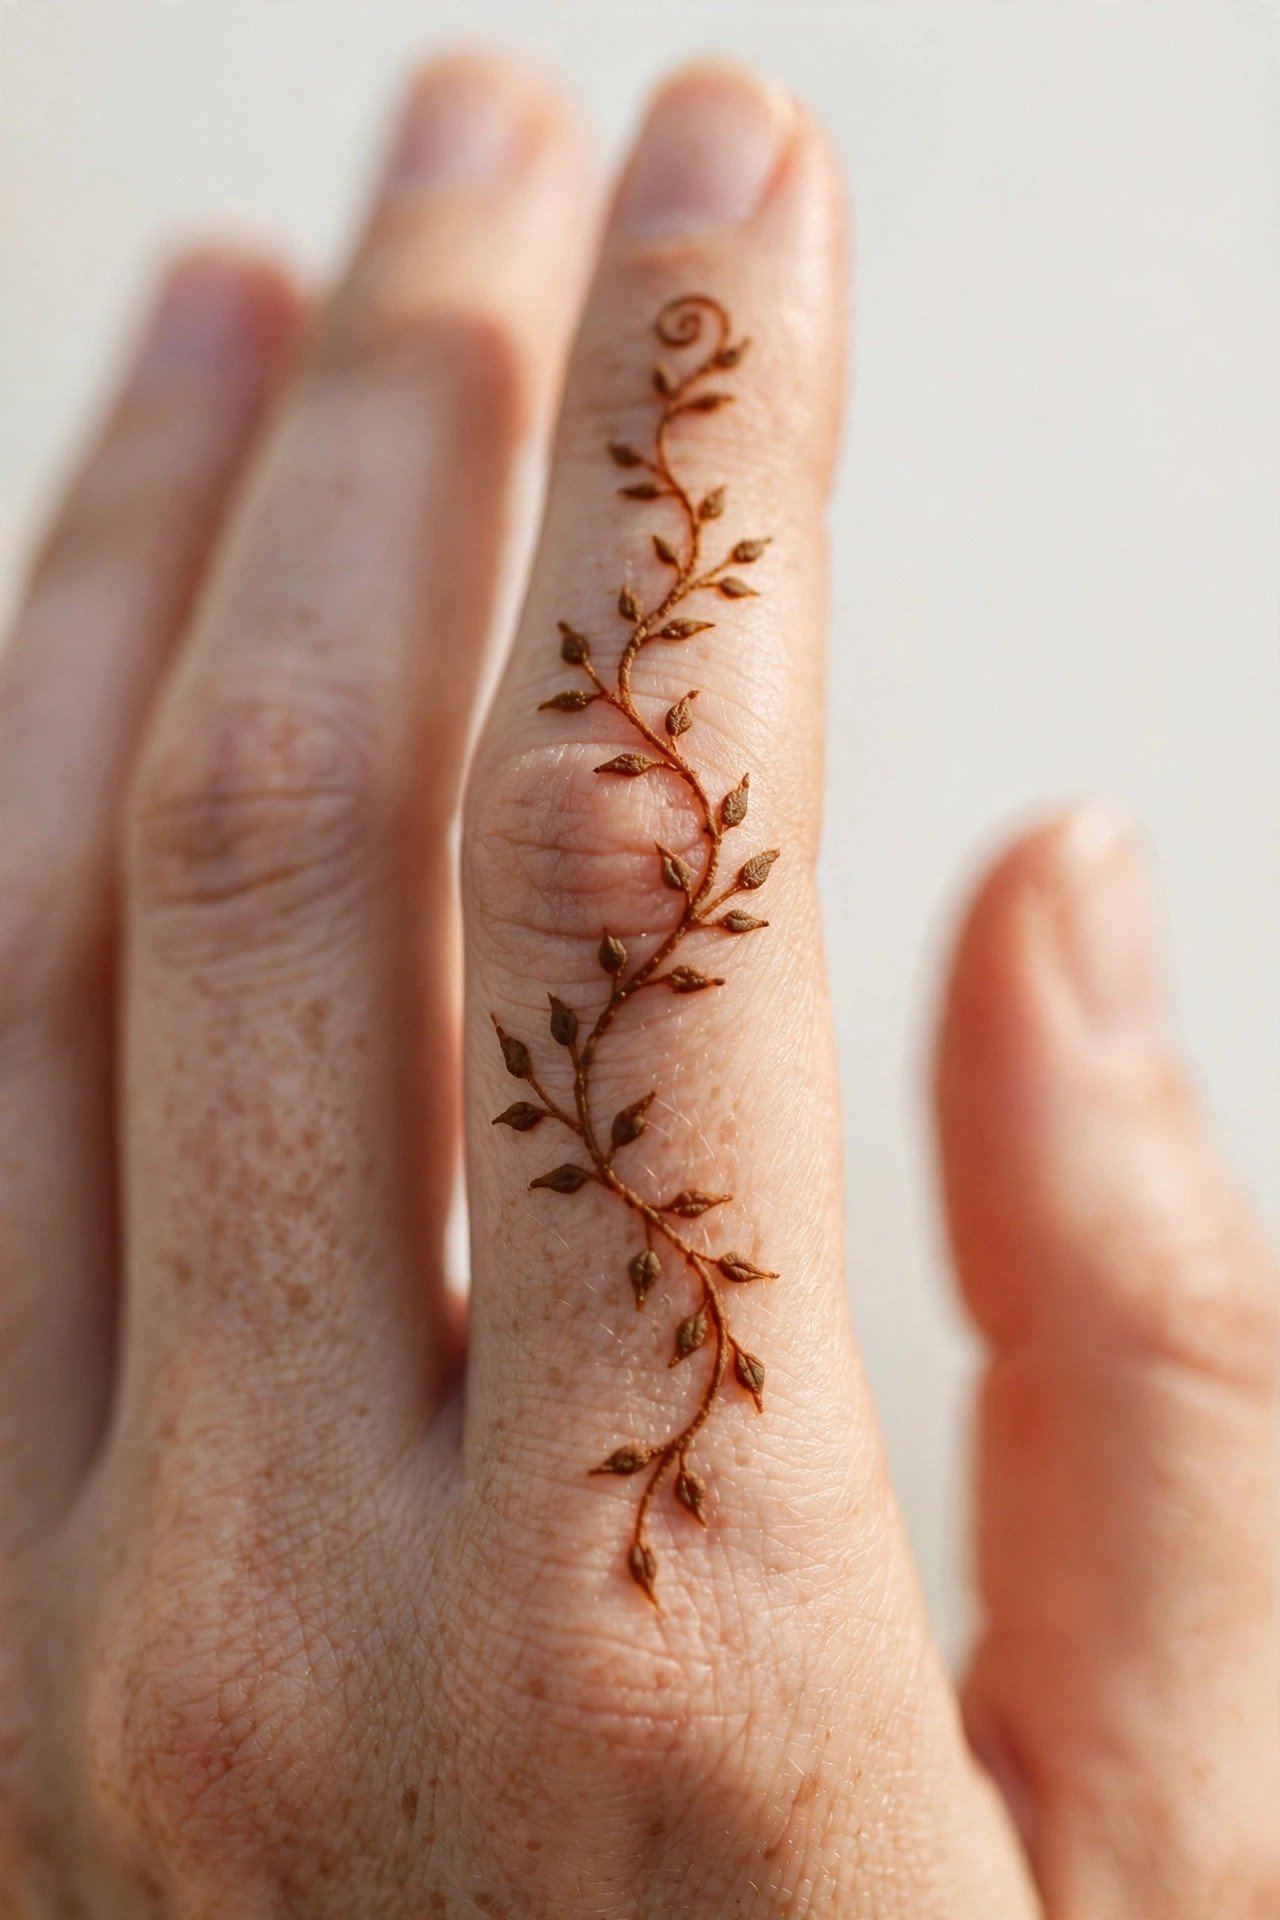
A single vine spiralling up one finger is the most flattering finger design there is, because the diagonal line makes the finger look longer. Start at the base with a thin stem, wind it gently upward, and add tiny leaves alternating on each side as you go. This takes about five minutes per finger and looks best done on just one or two fingers, with the rest bare, so the vine has room to breathe. It is a lovely choice with a simple band ring at the base of the same finger.
3. Tiny Flower Garland Chain
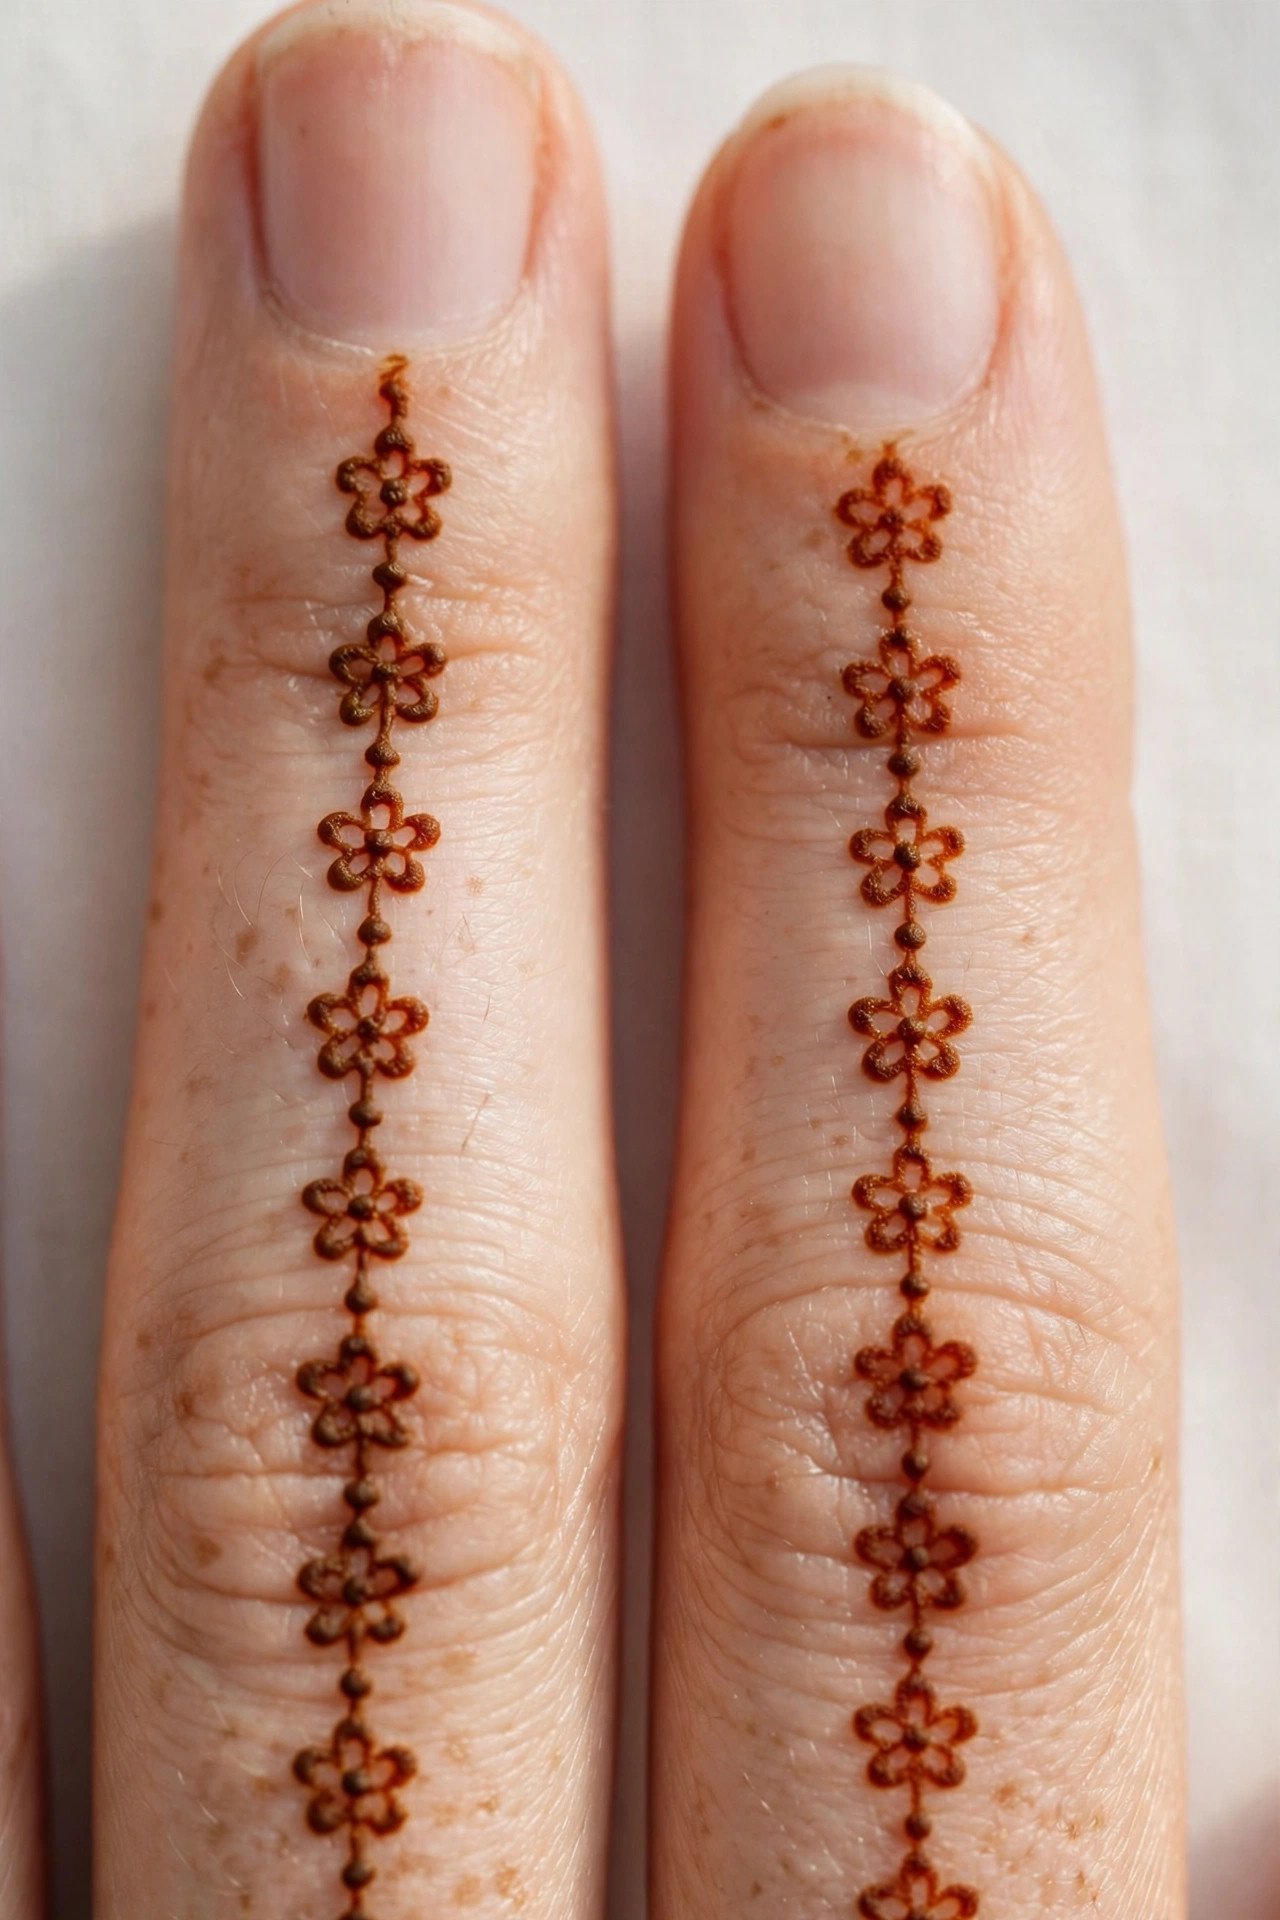
A garland chain links tiny five-petal flowers with dots down the length of a finger, like a miniature flower necklace worn on the hand. Keep the flowers small — no wider than the finger itself — and use dots rather than stems between them so the chain stays delicate. Two fingers done this way take about ten minutes, and the effect is festive without being heavy. This design photographs especially well next to a manicure in a soft pink or nude shade.
4. Polka Dot Fingers
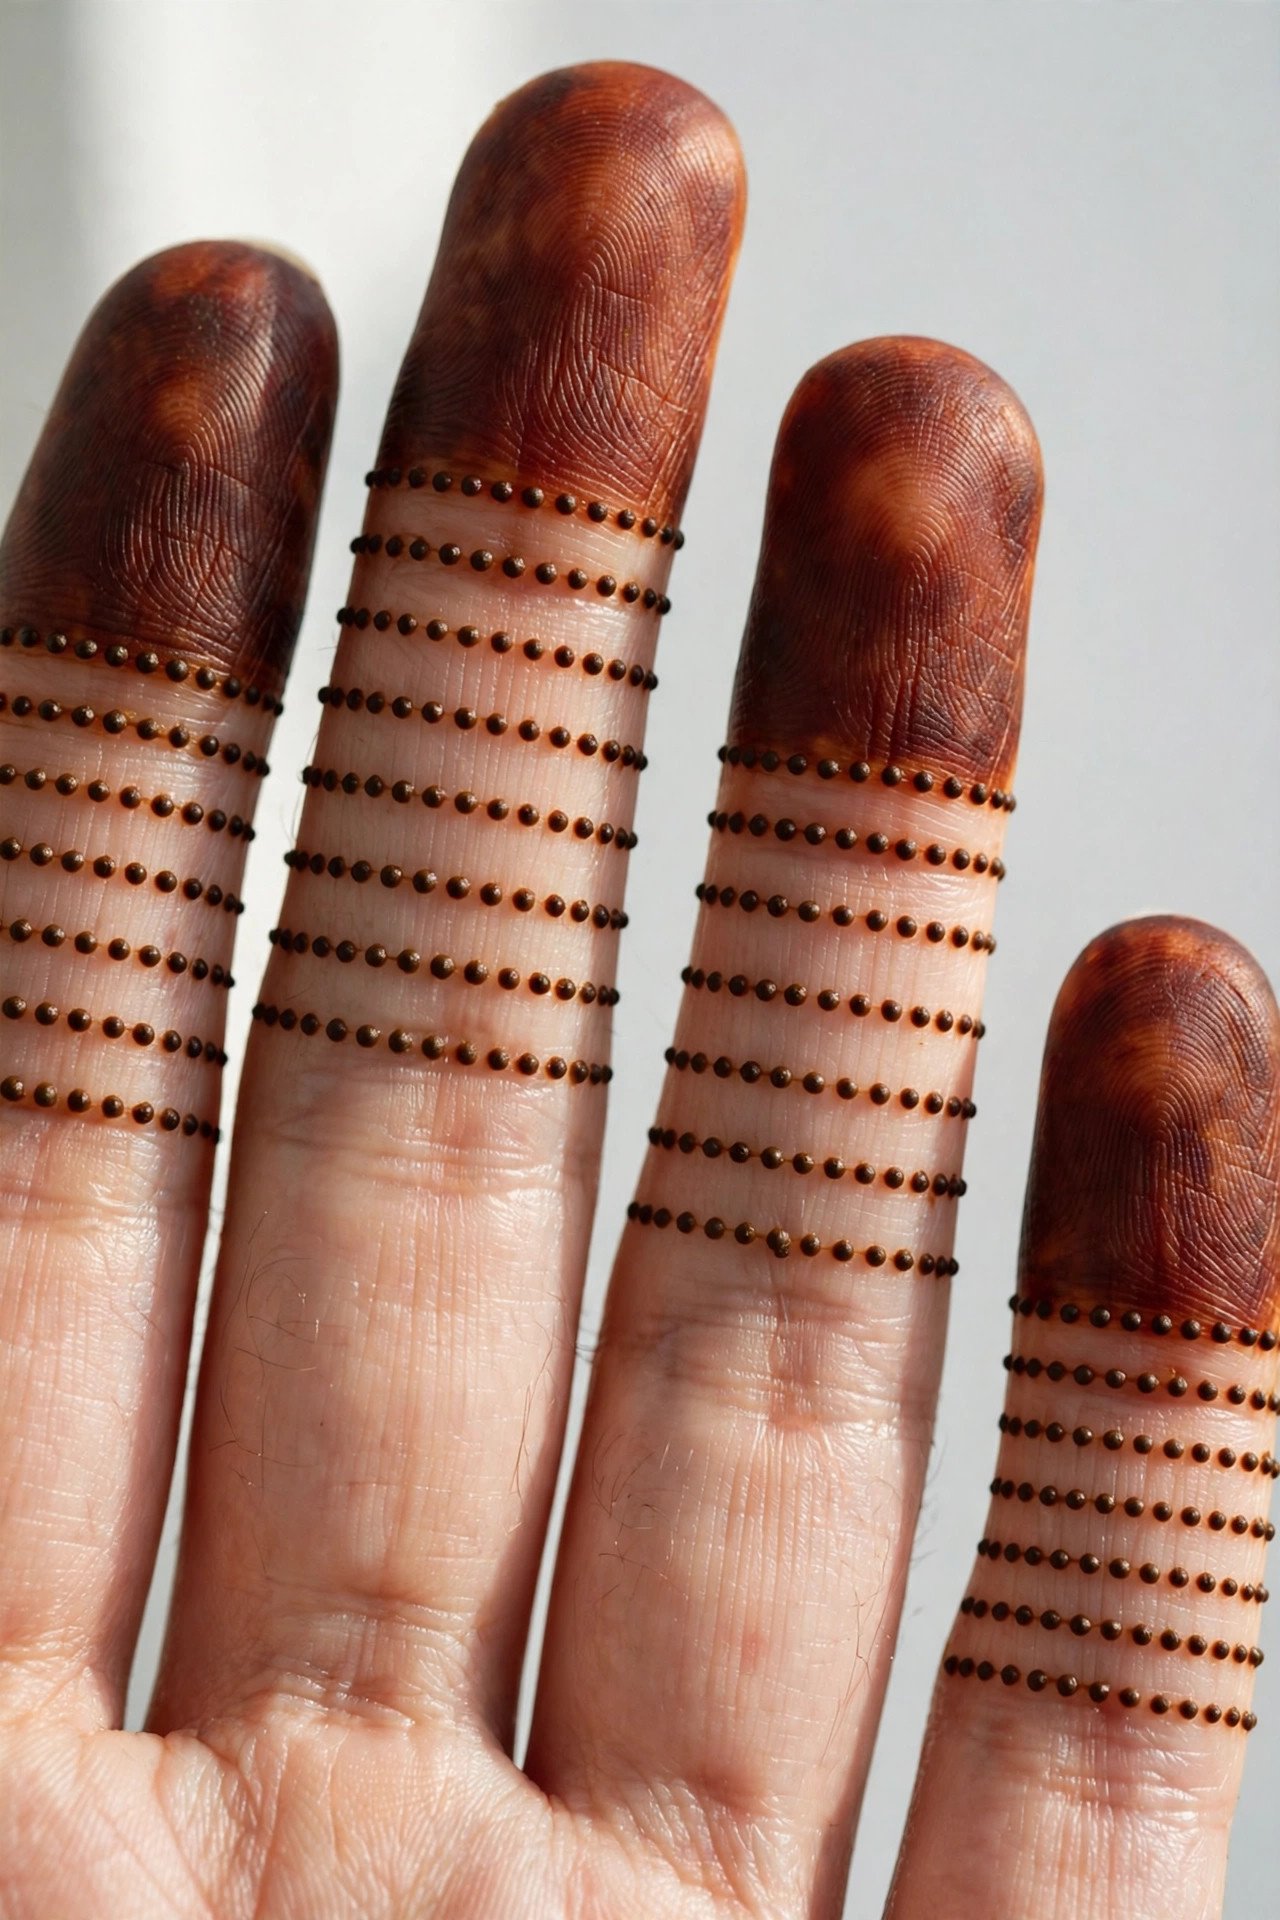
Polka dots are the most playful finger design, and the most forgiving: a dot that lands slightly off-line just joins the pattern. Cover each finger with neat rows of small dots, finishing with stained fingertips for a polished edge, and keep the dot size consistent for the cleanest result. The full set takes about twelve minutes, and it looks wonderful with bright nail polish, since the dots echo a dotted manicure. For a subtler version, dot only the ring and middle fingers.
5. Lace Net Fingers
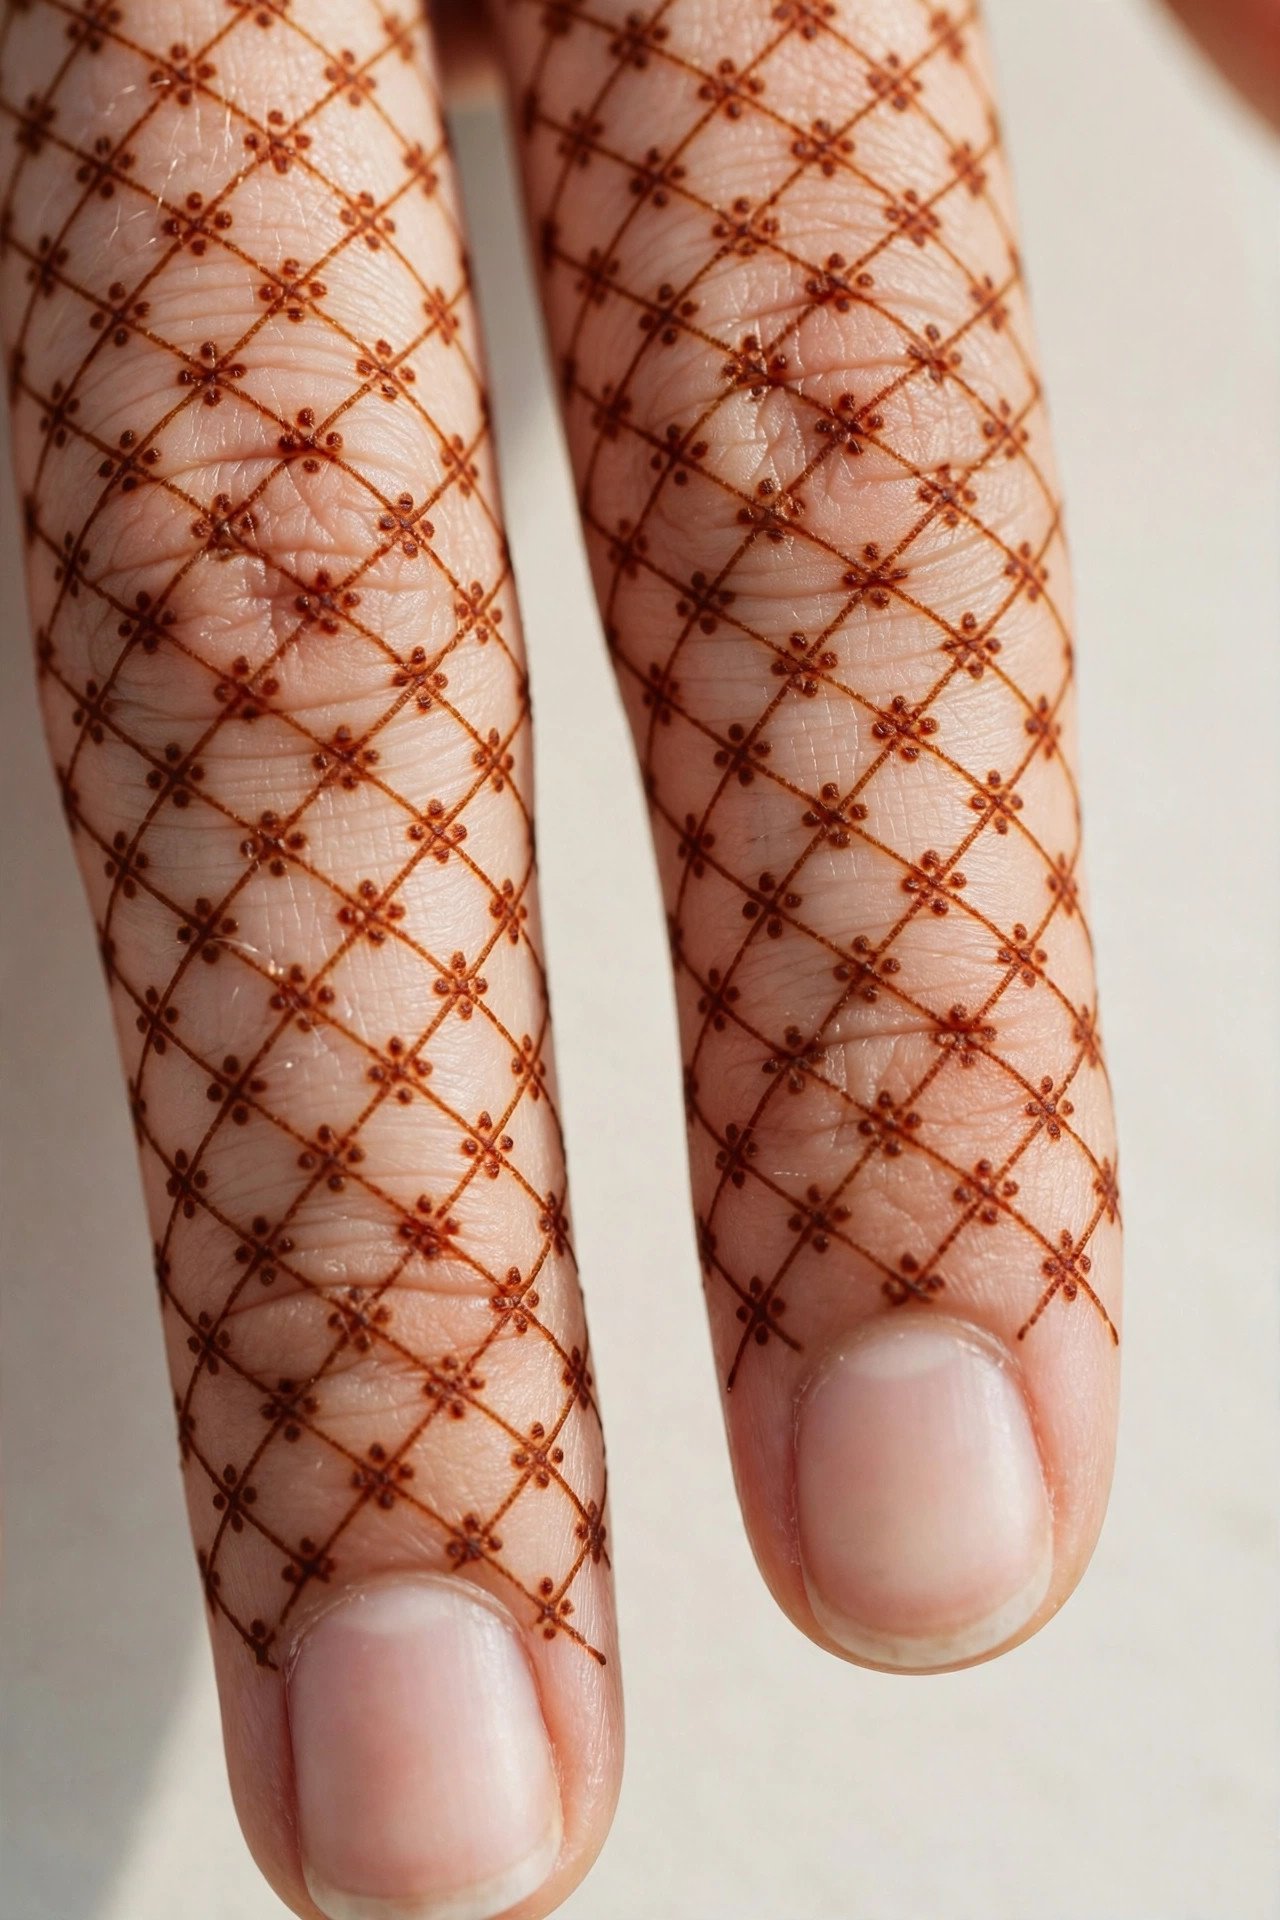
A lace net of crisscross henna lines, with a tiny flower at each crossing, turns a finger into something resembling fine lace gloves. The trick is keeping the lines light: draw the diagonal lines in one direction first, let them set for a minute, then cross them in the other direction. One or two fingers are enough — a full set of netted fingers can look busy — and the design takes about eight minutes per finger. Pair it with a plain outfit, since the net itself is the statement detail.
6. Arches and Stained Tips
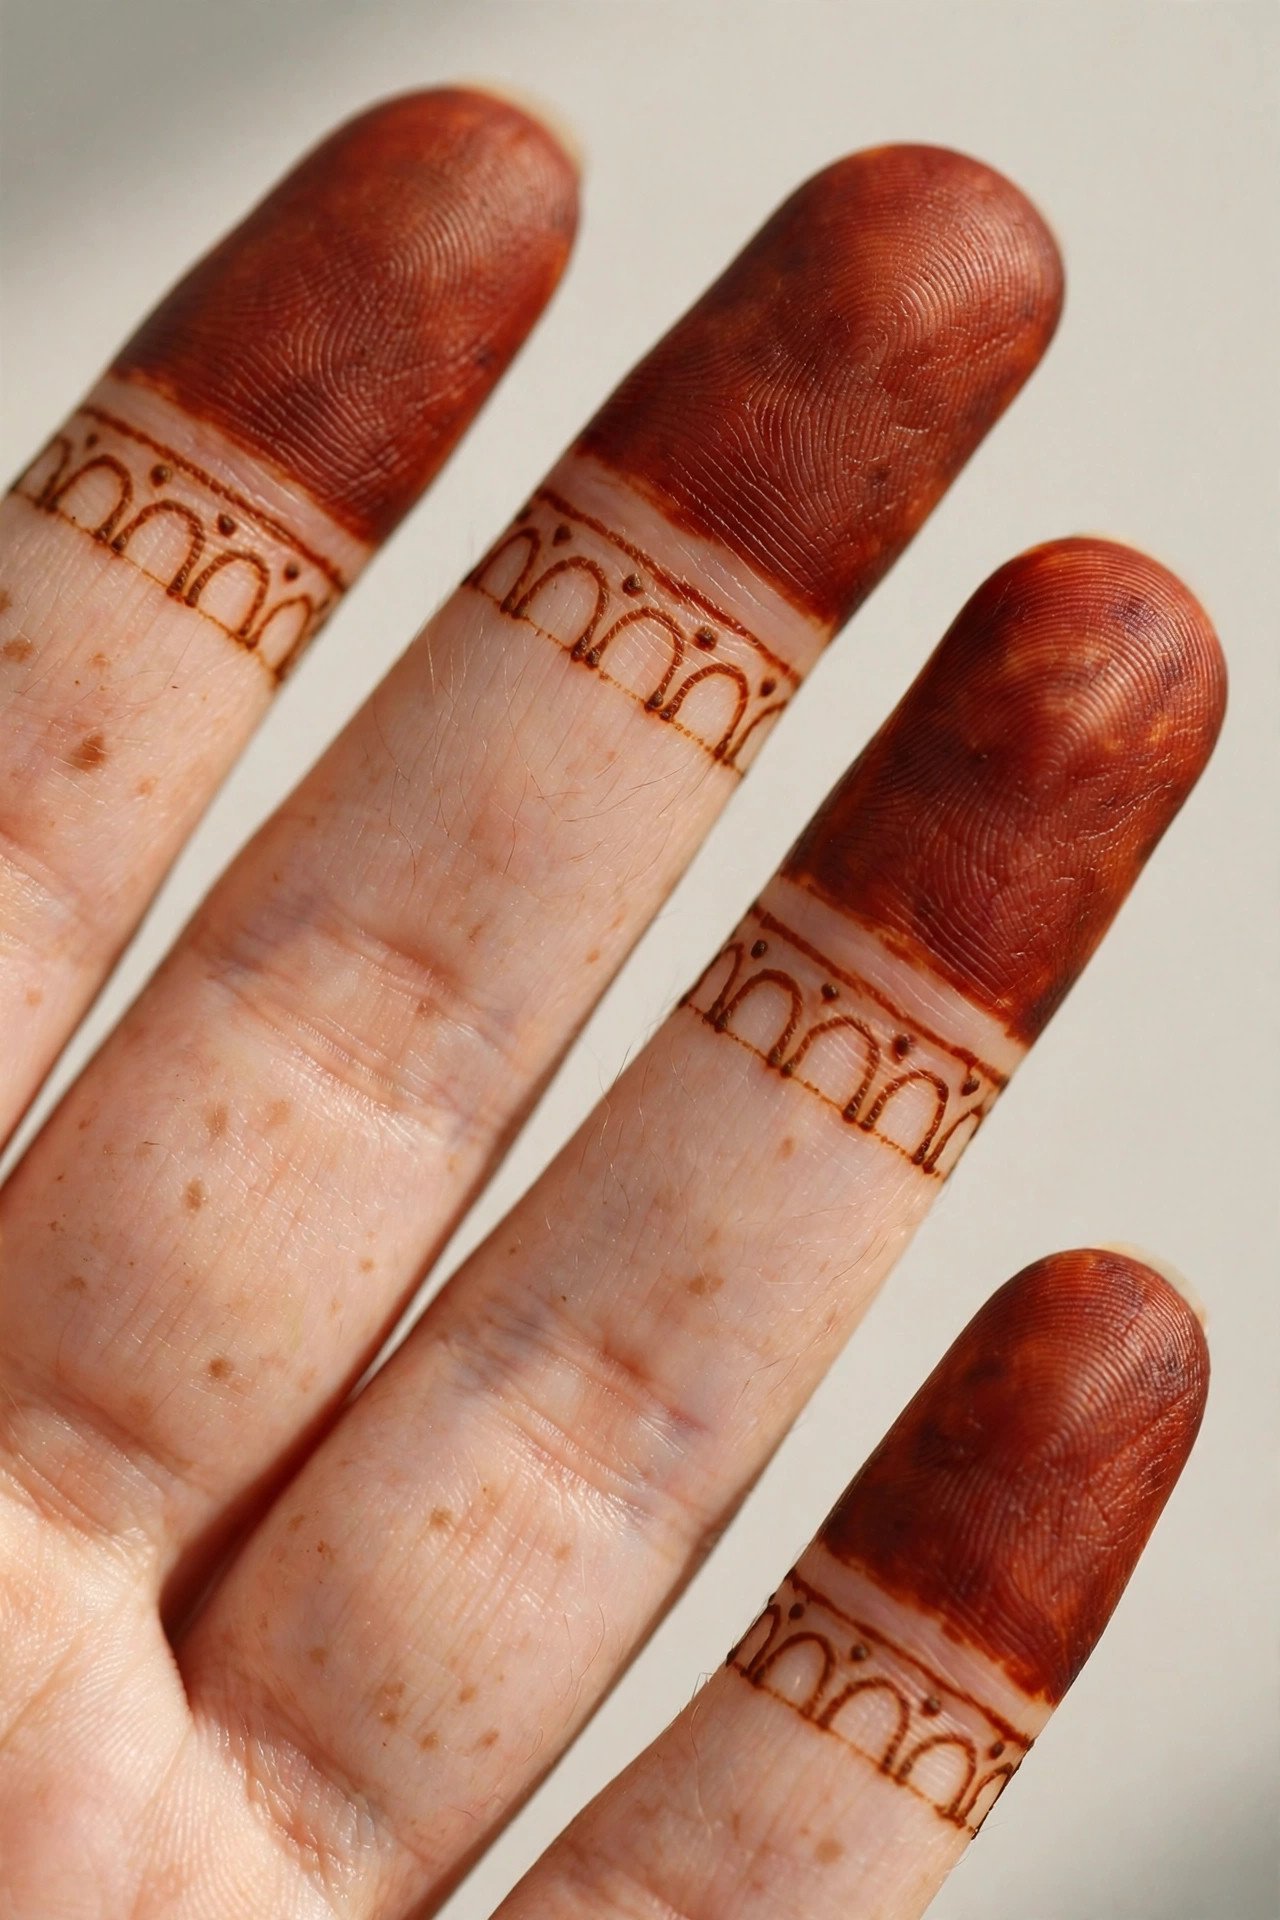
Small arches marching up each finger, topped with fully stained tips, is a classic finger look that never dates. The arches are just half-circles drawn across the finger, stacked from base to tip, and the stained tips give the whole design a finished, intentional edge. Allow about twelve minutes for all four fingers, and keep the arches the same width by marking light dots first. This is the design to choose when you want something traditional but quick, and it looks beautiful with gold jewellery.
7. Mehndi Cuff at the Finger Base
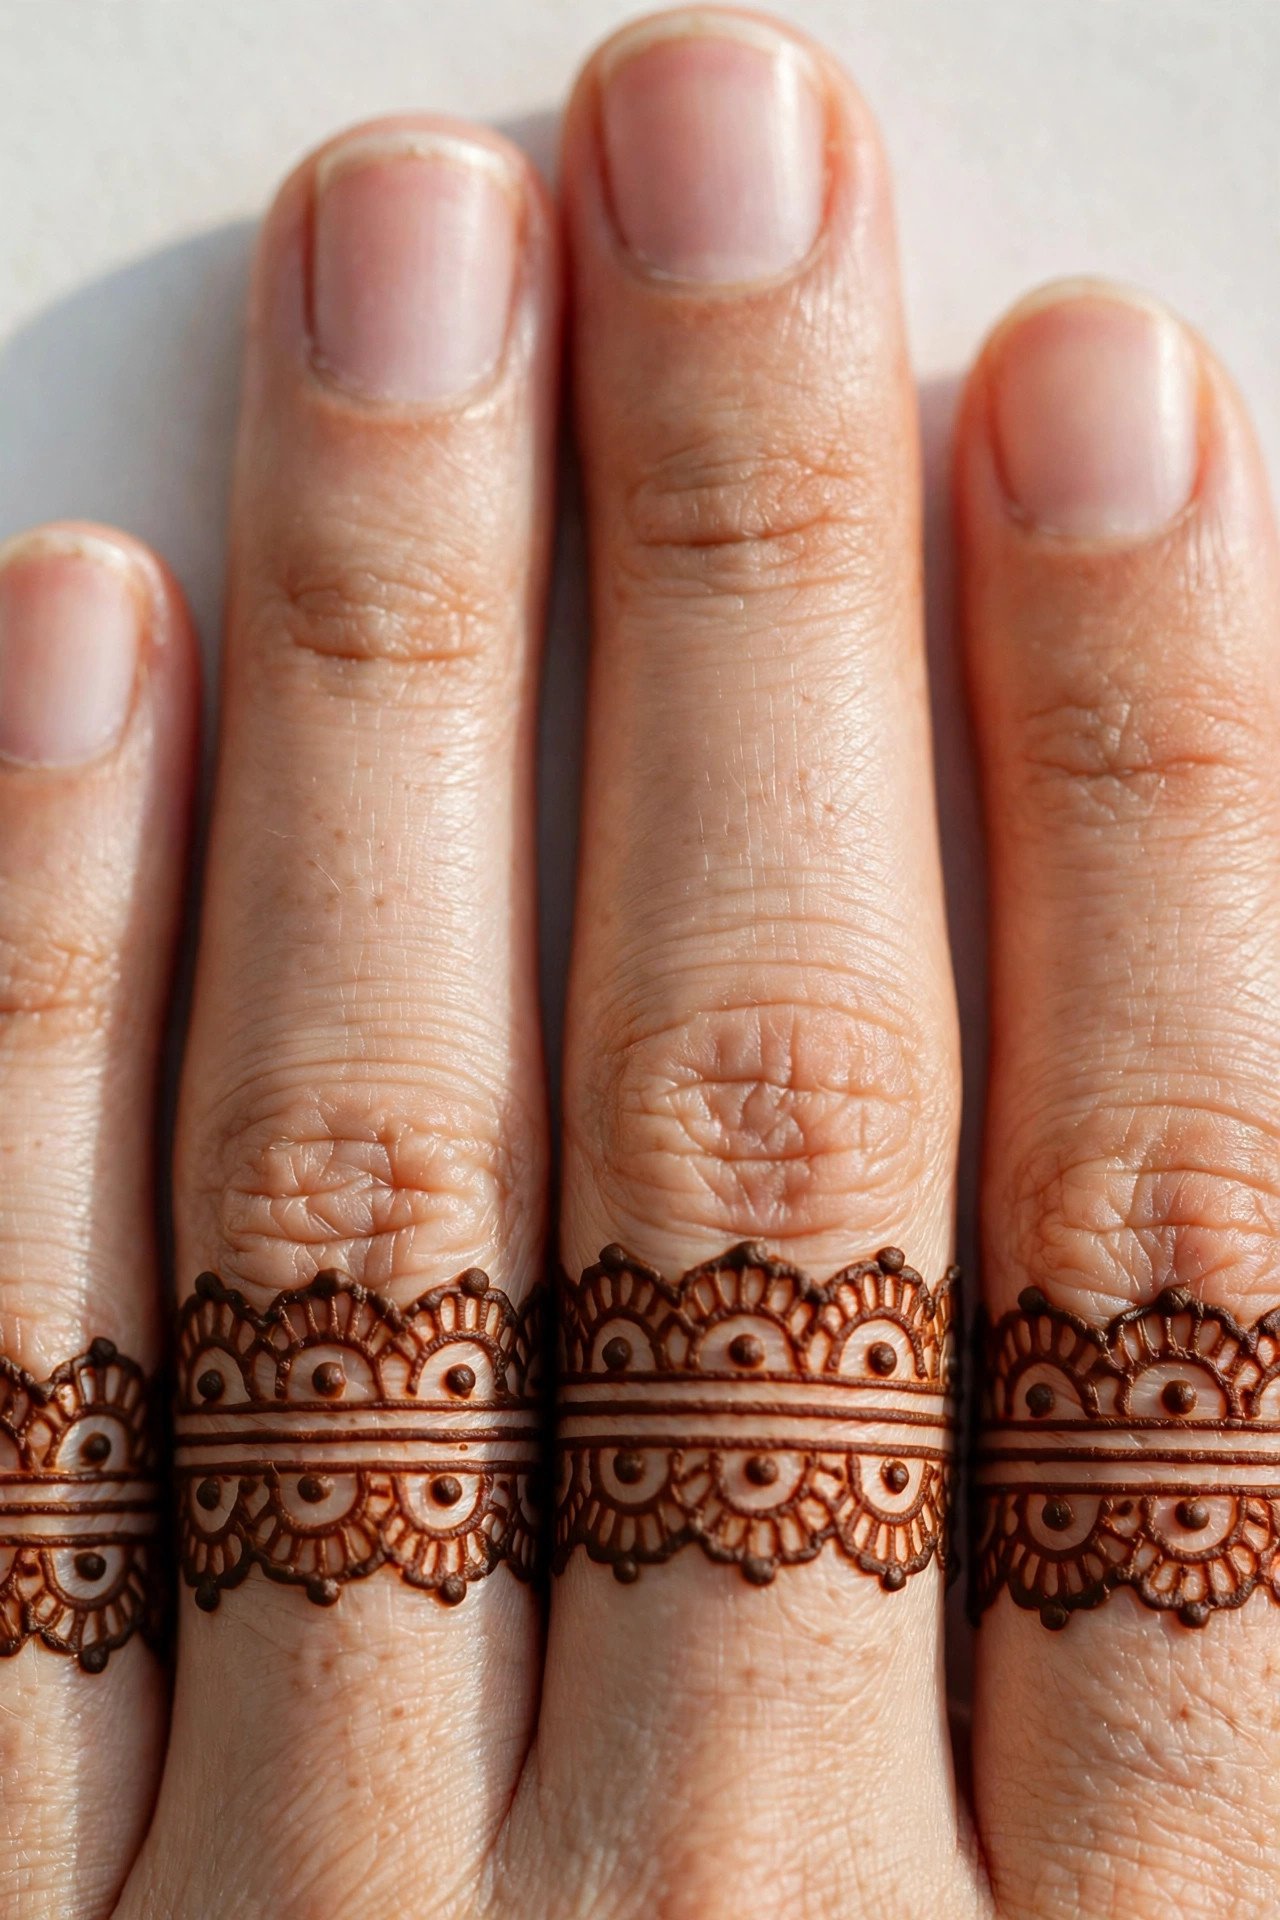
A wide cuff band at the base of the fingers, with scalloped edges and dots, reads like a row of miniature bracelets worn at the knuckles. Because the decorated area is small and flat, it is easy to draw neatly, and the fingers above the cuff stay completely bare, which keeps the look modern. The set takes about ten minutes and works well for hands that are often photographed holding a cup or a clutch. Wear a ring above the cuff, not over it, so both details stay visible.
8. Single-Finger Statement
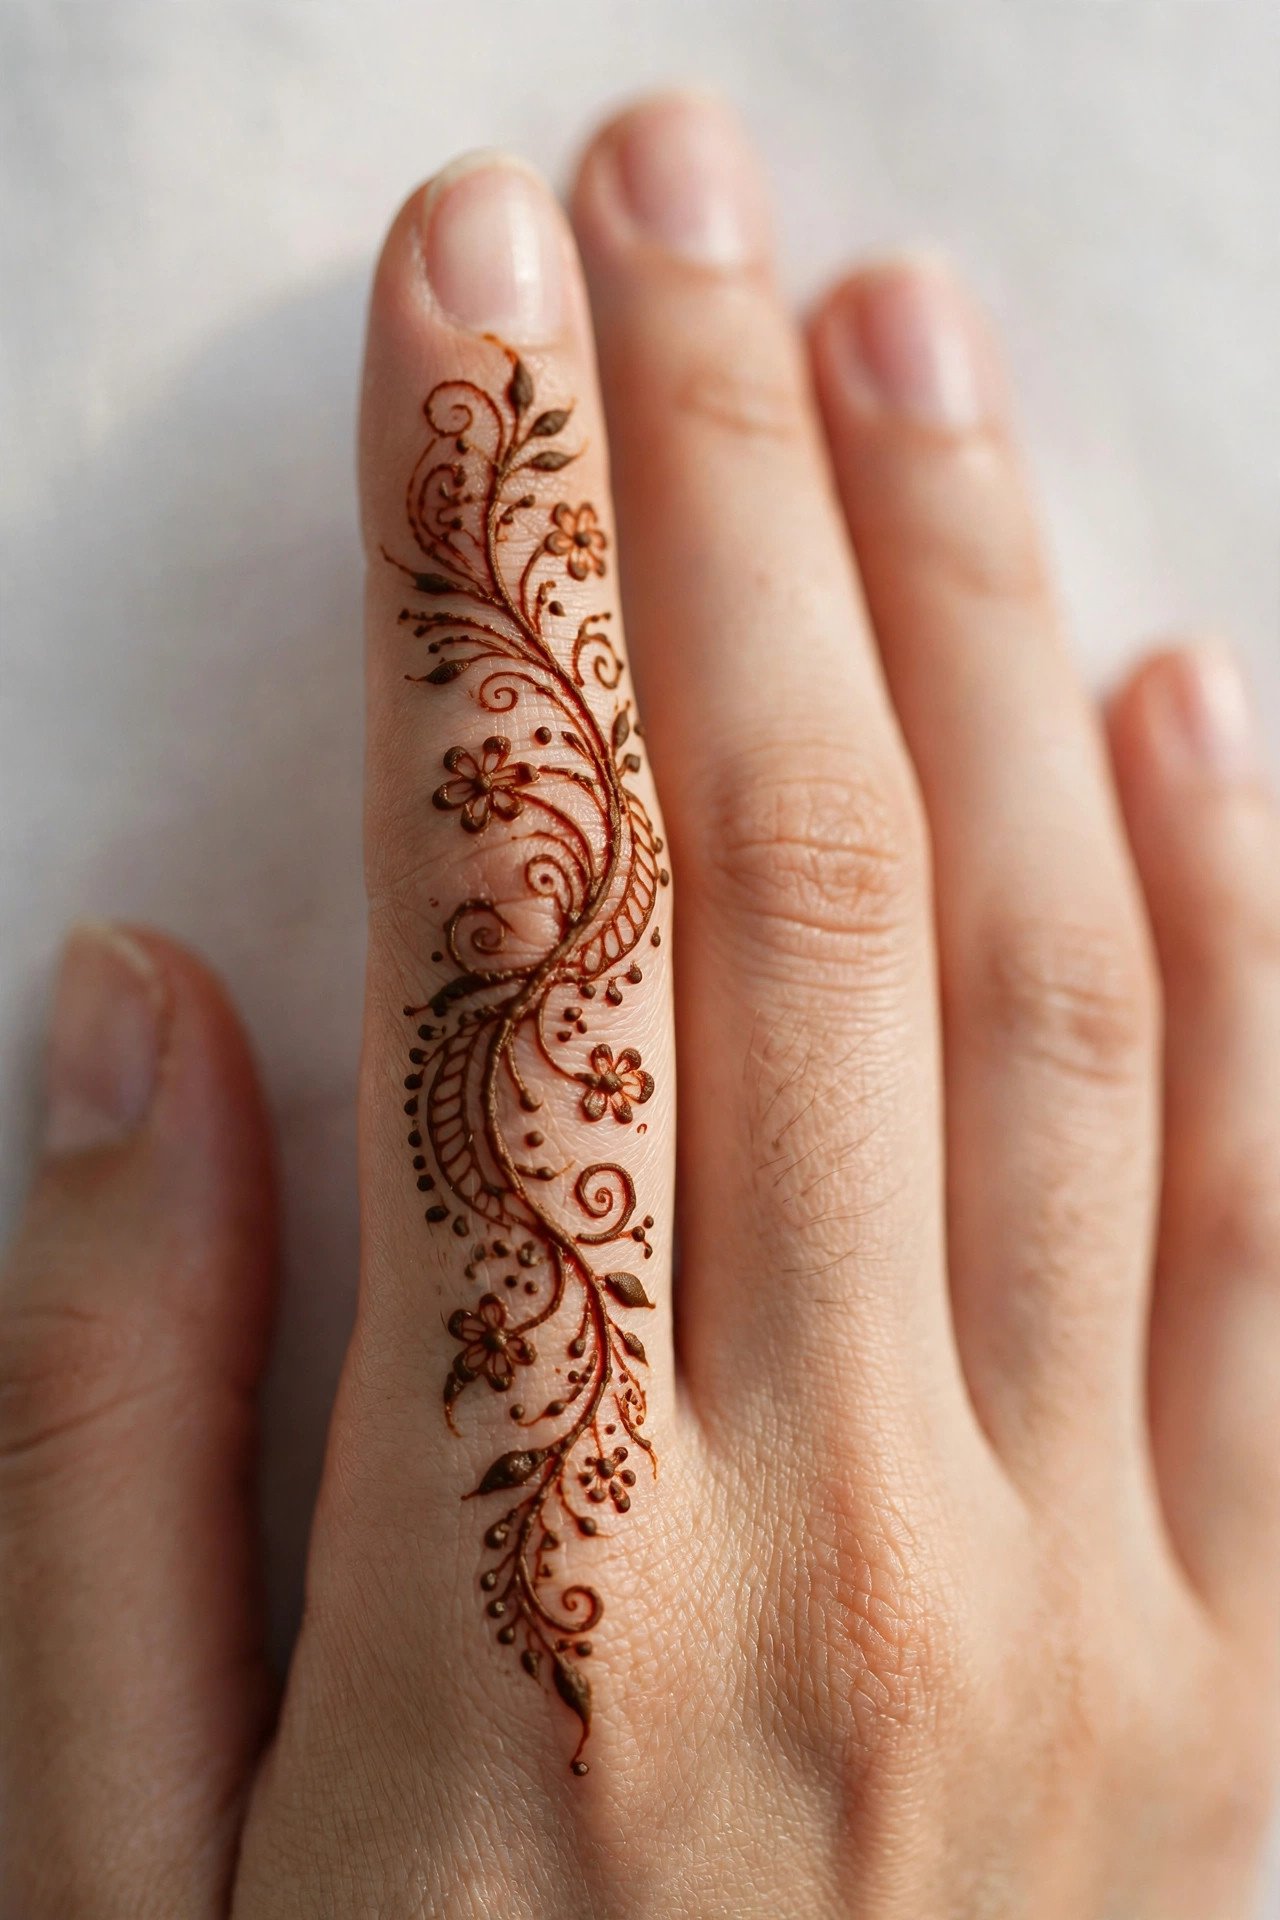
Decorating exactly one finger while leaving the rest bare is a bold, editorial choice — and the easiest finger design of all, since you only have to get one finger right. Choose the index finger, cover it with a vine and tiny flowers from base to tip, and let the empty fingers around it do the framing. It takes about six minutes and looks striking in photos, especially with a statement ring on the neighbouring finger. This is the perfect design for trying a new motif without committing to a full set.
9. Bow and Vine

A small bow drawn in henna on one finger, with a thin vine trailing down from it, is sweet without being childish — the key is keeping the bow small and neat. Draw two loops and two short tails at the base of the finger, then let the vine carry the eye toward the tip. It takes about seven minutes and looks charming on the ring finger, where it echoes a ring. Keep the rest of the hand bare and the nails simple, so the bow stays the star of the show.
10. Ring-to-Knuckle Chain
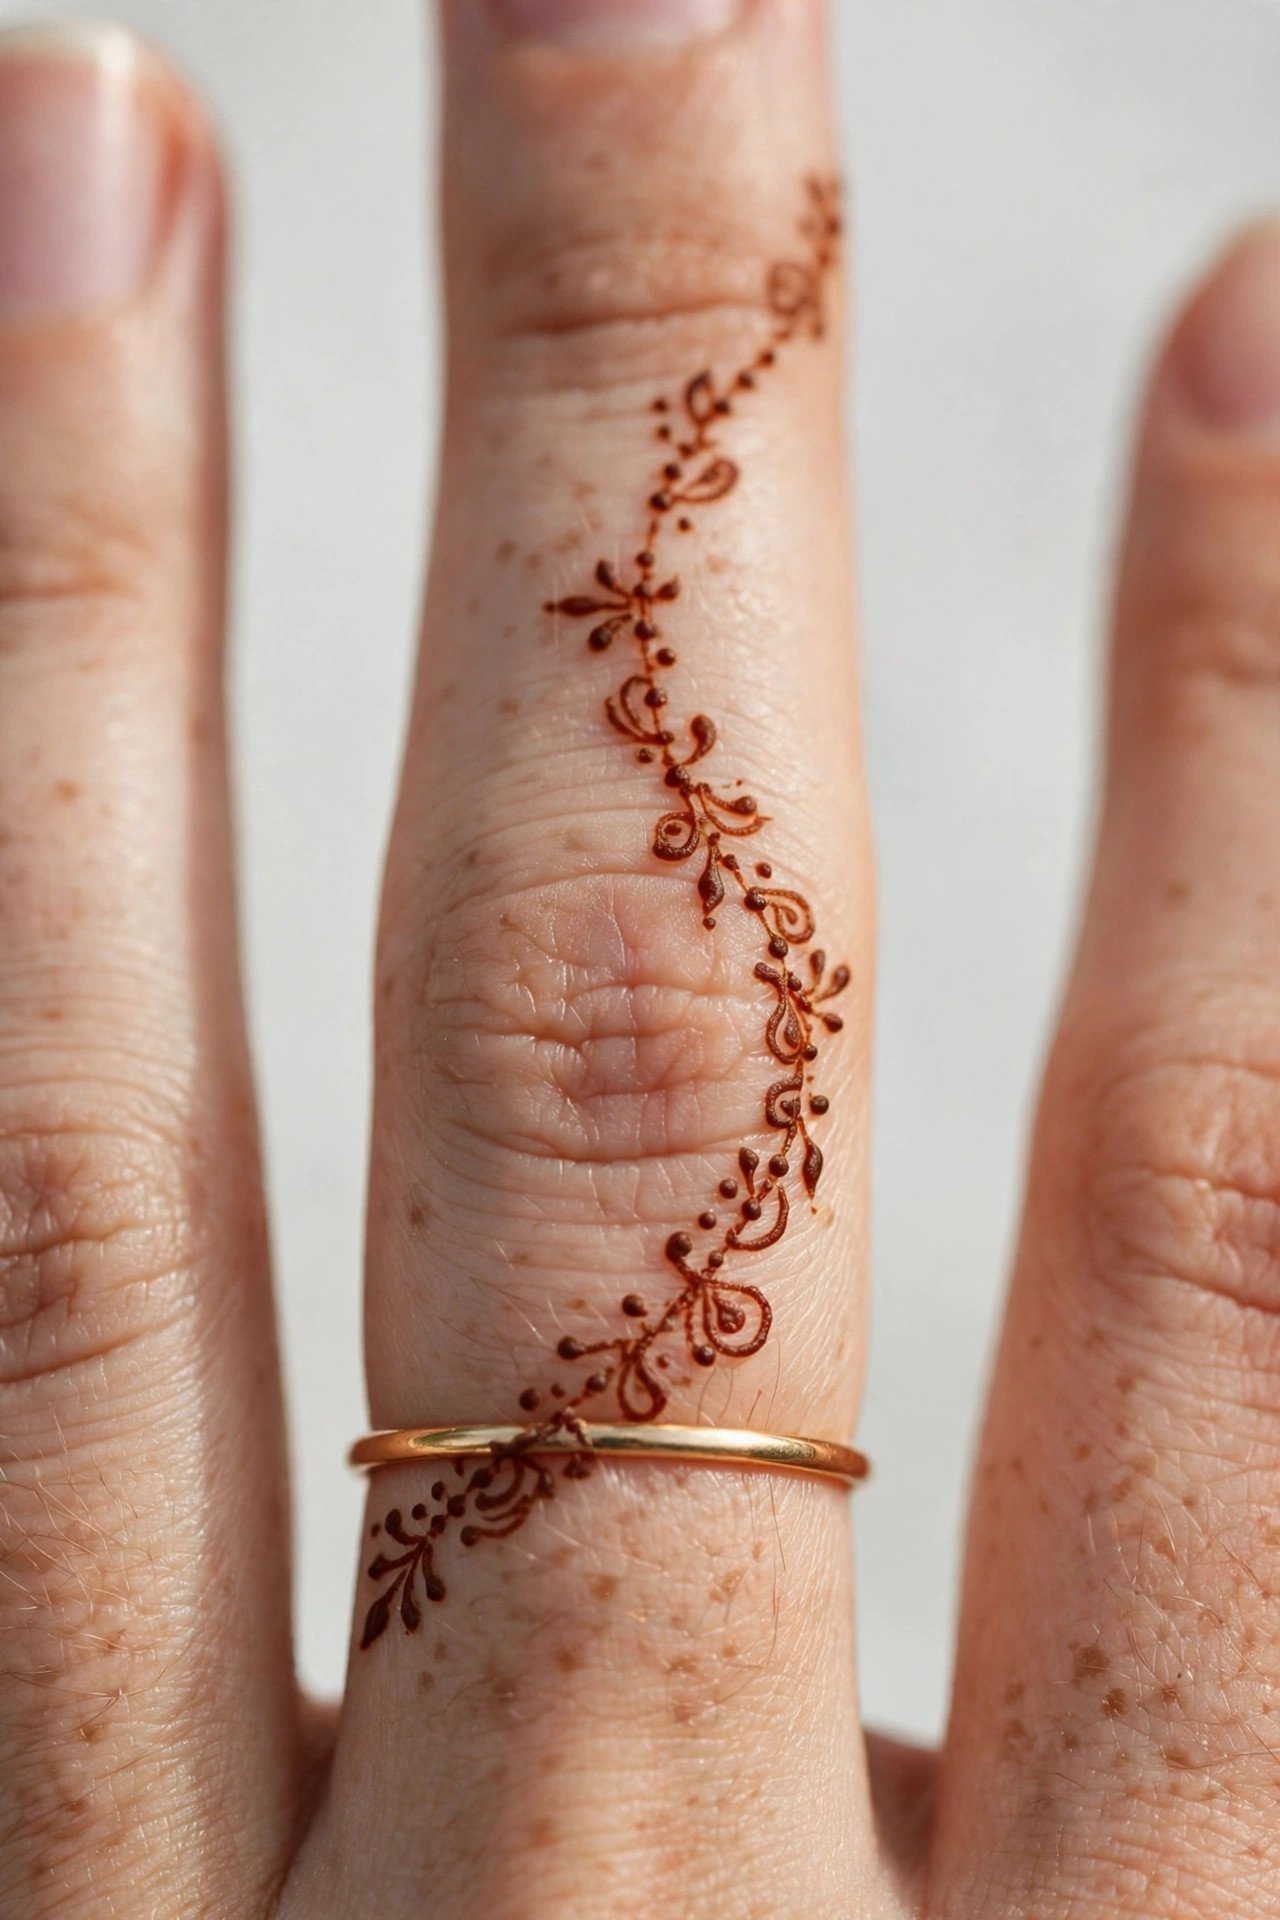
A thin henna chain running from a ring band up over the knuckle borrows its shape from finger-chain jewellery, and it photographs beautifully because it follows the hand’s natural lines. Draw the ring band first, then a delicate chain of dots or tiny links curving over the knuckle and stopping halfway up the finger. This takes about six minutes per finger and looks best on the ring and middle fingers together. It pairs naturally with a real ring worn at the base of the same finger.
11. Tiny Floral Ring on Every Finger

One tiny floral ring — a small flower circled by dots — placed at the same knuckle height on every finger gives a perfectly matched, jewellery-like set. The repetition is what makes it work, so keep each flower the same size and sit them all at the same height. The set takes about twelve minutes, and it looks refined with a French manicure or a sheer nude polish. For a party, add stained tips to the same fingers and the set instantly looks more festive.
12. Chevron Bands

Chevron bands — zigzag lines stacked down each finger — are the most modern design in this list, with a graphic energy that suits a minimal outfit and bold nail colour. Draw each zigzag slowly, keeping the peaks aligned down the centre of the finger, and stack three or four bands per finger. The set takes about fifteen minutes, slightly longer than the others, but the result looks deliberately designed rather than doodled. This is the finger design to choose when you want henna that reads as contemporary, not traditional.
13. Dotted Ring with a Tiny Flower
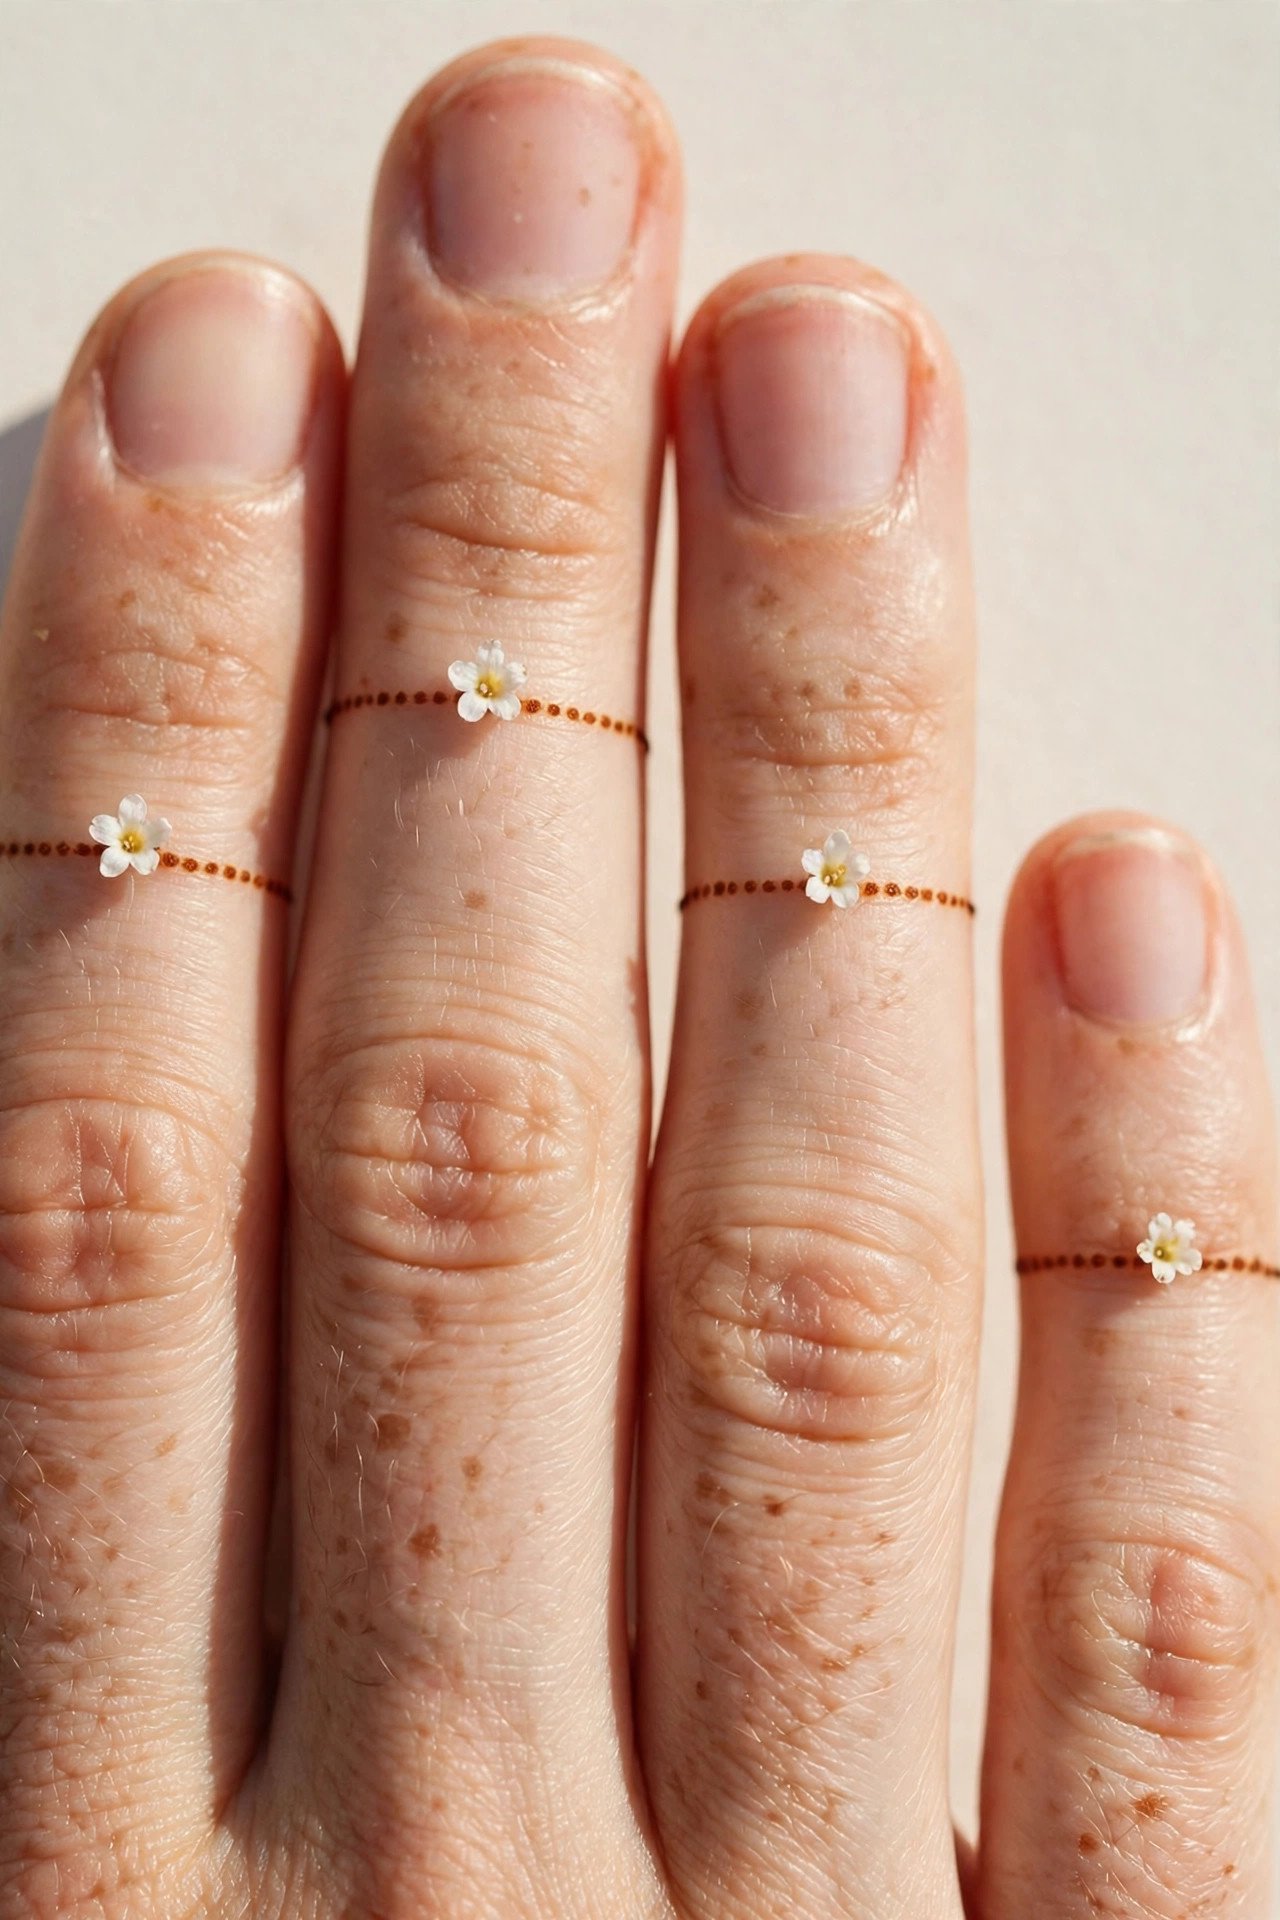
A dotted ring band on each finger, topped with one tiny flower sitting on the band, is the daintiest design here — barely there, but noticeable up close. The dotted band is quick and forgiving, and the single flower gives each finger a focal point without any extra drawing. Allow about ten minutes for the set, and place the flower on the outer side of each finger so it shows when the hand rests naturally. This design is ideal for everyday wear and for pairing with real rings.
14. Full Finger Jewellery Set
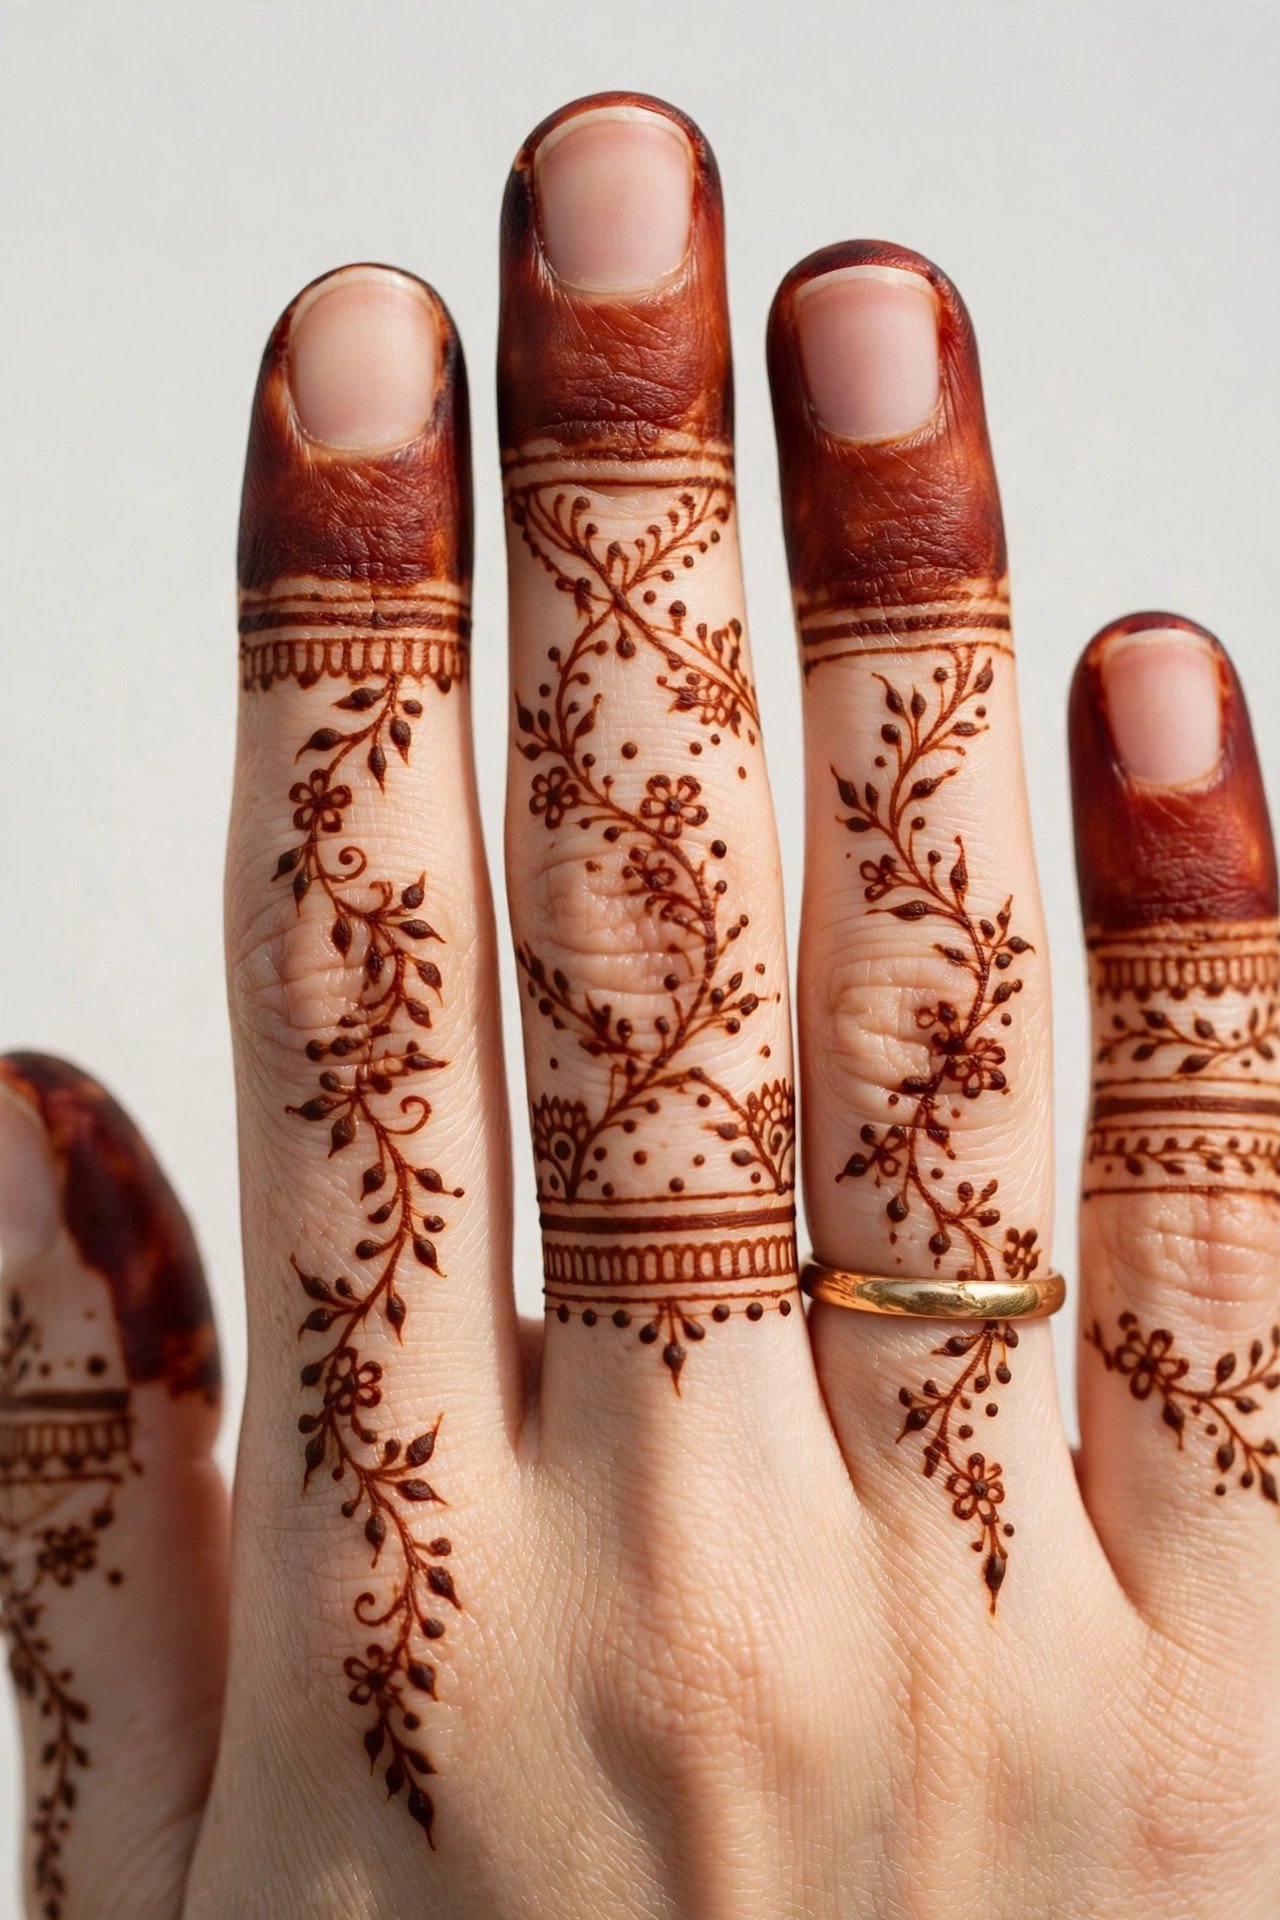
For a celebration, combine everything: ring bands, a winding vine, tiny flowers and stained tips across all fingers, finished with a simple real gold ring on the ring finger. Each element is one you have already seen in this list, so the full set is a matter of patience — about twenty minutes — rather than new skill. Keep the motifs small and the spacing even, and the set will read as one coordinated piece of jewellery rather than four separate designs. This is the finger look to save for the occasions you want photographed.
A few finger-specific tips before you start: fingers move, so rest your hand flat on a table and draw with your wrist supported, not hovering. Keep the paste thin on the sides of the fingers, where it smudges most easily, and let each finger dry for a few minutes before moving on to the next. Leave the paste on for four to six hours, avoid washing your hands while it sets, and seal the dried design with a dab of lemon and sugar if you want a deeper stain. Because finger designs use so little paste, they fade faster than full-hand designs — enjoy them at their darkest in the first two days, and reapply a single finger any time you want a quick refresh.